

Create Your First Agent
From the Dashboard, choose + New Agent to open the creation wizard. It walks you through the essentials in four steps — Basic Info → Instructions → Review → Done — and shows a live preview as you type.
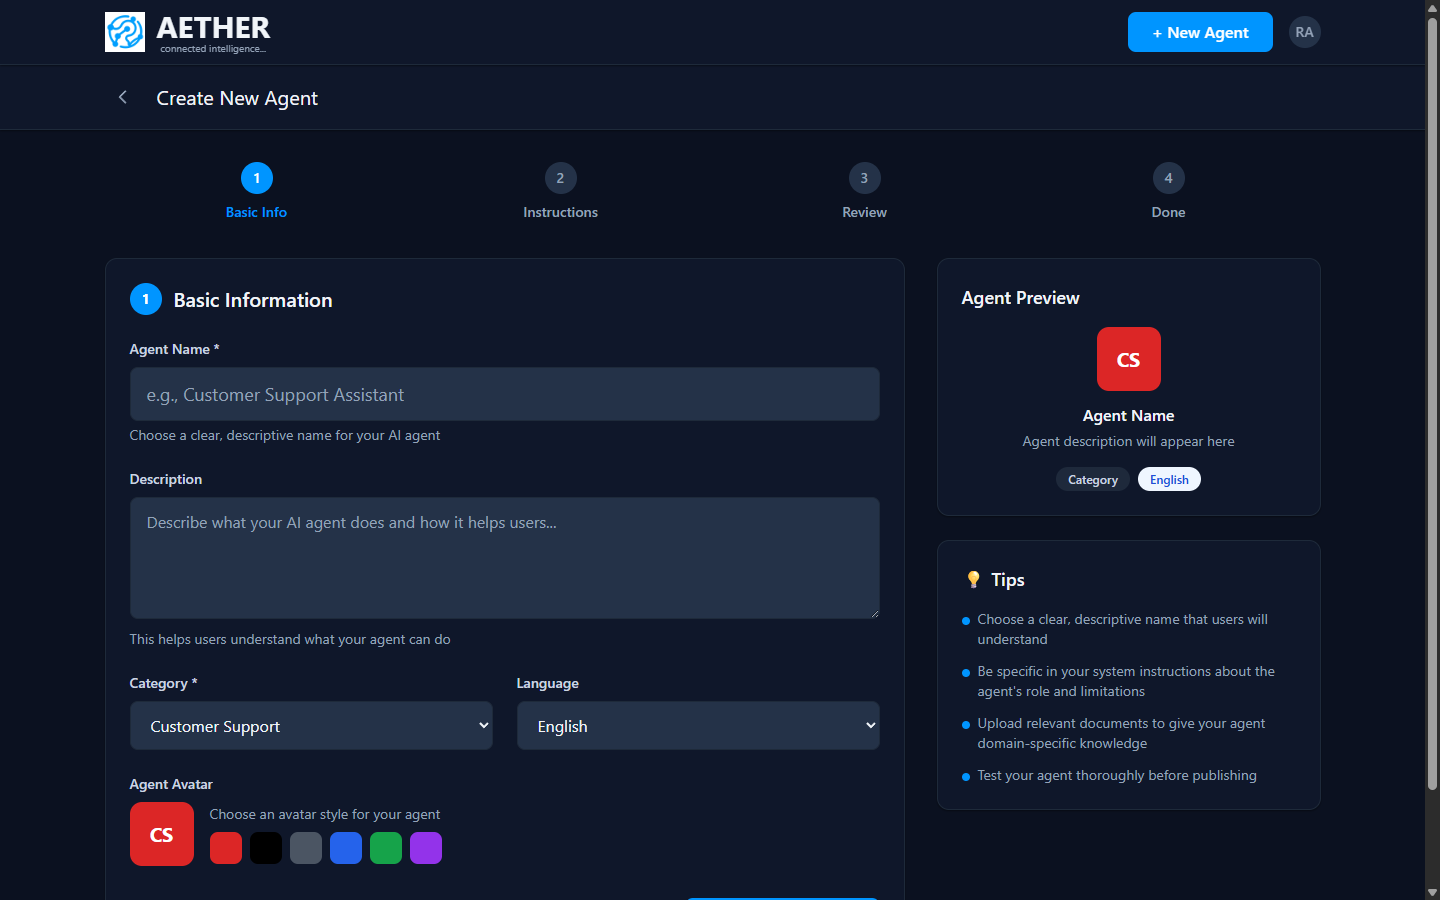
Step 1 — Basic Info
- Agent Name — a clear, descriptive name your users will see.
- Description — what the agent does and who it helps.
- Category and Language — pick the closest category and the primary language.
- Agent Avatar — choose an avatar colour; the preview updates instantly.
Step 2 — Instructions
Give the agent its system instructions — the prompt that defines its role, tone and boundaries. See System Instructions for how to write these well.
Step 3 — Review
Check the summary. Nothing is published yet — you can keep refining.
Step 4 — Done
Your agent is created as a draft. From here you'll open the full agent builder to add knowledge, tools and workflows, then test and publish it.
Tip: You don't have to get everything right in the wizard. It captures the basics; the agent builder is where you fine-tune persona, attach knowledge sources, connect tools, and design workflows.
Next steps
- Agent Configuration — the full builder.
- Adding Knowledge Sources — ground the agent in your data.